27 May 2017

Modern Lettering with watercolour bird wreath


Since like ages I wrote something with nibs pen. 

I'm not really good with calligraphy, I consider myself a beginner but I truly loved the easy flow of the flexible nibs. I wish I was introduced with this type of nibs during my school years, then I might be an expect now! Lol. 

"Coming together is a beginning
  Keeping together is a progress
  Working together is a success"
By Henry Ford

Stumpled upon this quote while watching Criminal Minds (Season 11)

I used Brause Extra fine 66 nibs for this meaningful quote. Bought it from Stickerrific.com., an online art store in Malaysia. 


It's really flexible and ahem fragile. Lol. Cos it bend so easily, I'm bit worry it will break off. Actually I think I did broke it cos at the end of this handwriting, the ink was stuck. 🤦🏼‍♀️


Honestly I am truly un-creative. But no shame on it. #takmalu

Cos there is tonne and tonne of beautiful creation can be found online, especially Instagram and Pinterest!


Loved this (@estherpeck at IG) but didn't really want to spend too much time on the bird. 


So later found this. Perfect for simple wreath I planned. But I paint 2 birds instead of one. As Chinese fengshui said, everything must be in pair! Lol


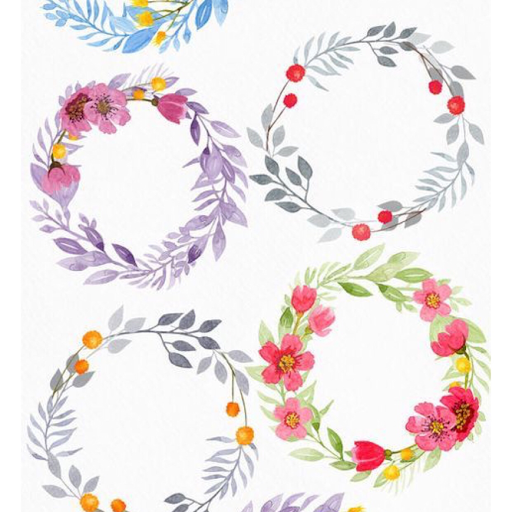
And this ! Simple design that I don't think I can go wrong with it. Hehe (Both from Pinterest under watercolour flower wreath search)


Tadah! A midnight drawing to cure my insomnia. 💆🏻

24 May 2017

Ombré gel nail with dried flower mani

I have been delaying of buying gel nail to try. I normally visit nail salon if I want get gel nail for special occasion likes holiday or cny. Cos I have no knowledge and gelnail seem needed lotsa equipment compare to normal nail polish.

However  recently I really loved the chrome effect, so invested a sum on it, but since they are UK products, so it was freaking expensive! So sad cos our ringgit currency deflated so much this few years. Anyhow Now I am hooked on the gelnail (but not the acrylic one la), so went to google malaysia online store for a cheaper option. 

Buying from Taobao is pretty troublesome since most of them do not accept international logistics, so I have to appoint an agent to ship it. I seriously don't really want to go thru the trouble and also the long waiting period.

Therefore I was pretty ecstatic when found www.blingnailheart.com! Yay to me! Lol.

Their product listing is pretty cheap. Most probably a china products, but don't bother la. Ohh the website is in Chinese, and even the fb customer service (the boss?) converse in Chinese also. She is very helpful, tried to reply in English or left voice msg to me when I told her "sorry I dunno Chinese 😔" 

Anyway selected few products to try (They have tonne of range!).


All these cost below rm200. FYI a pro gelnail colour can easily cost at least rm100 per bottle if it's a Japan brand or UK brand.


The colours I bought! Lol. Either blue or red. 2 is the dried flower gelnail. 


Loved the dried nail. But found it pretty hard to dig out the flower only. Hahaha same problem I faced whenever I used glitter nail polish. 😒


Accessories. Dunno what I will do with the frame. But since it's cheap. Just buy la. 🤣


This is a must have product (RM28) Tool to get the ombré effect. It's very easy to use and give you a very clean ombré result. 


Tadah! My ocean ombré gel nail art. 

Product I used :-

Base - Missu Beauty (UK)
Strengthener - Missu Beauty (UK)
1st coat - Nude colour gel no. NC08 (RM8)
2nd-4th coat - Che gel no. LV030 (blue colour) (RM16)
Ring finger nail - dried flower blue colour (RM8)
Top cost - Missu Beauty (UK)

 
Closer look of the dried flower.

Overall quite happy with the result. Hopefully the products I just bought can last long! Eventhough they are cheap la.

Thanks for reading!

21 May 2017

Printer Friendly Shrinking Paper - Diy keychain


My first attempt using the printer friendly shrinking paper to made a keychain.

Using my own drawing of recent Hokkaido piece, printed it using LaserJet printer (ahem asked friend for favor cos my printer is bit lousy).

Maybe the paper I used was a transparent type, bit surprised with the result - super light.


My optimum size for a keychain is 6-7cm. Cos after baking, it would shrinked by 60% at least.


After painfully cutting thru all. Lol


All done. They look lighter cos bear in mind, it's a transparent sheet. If you put them on a white paper, they look much define. 


On a baking tray, if u have a flat one, it is definitely a better choice compare to my uneven one.

Oven temperature ? Up to you, so long it get hot. I put 200.

Once it changed aka shrinking to a smaller one, off the oven immediately. If leave it too long, it will burn!  


See how much they have shrinked! 


Then quickly take if off and press it flat with any tool you can find. If you have a flat surface tray, I think you can skipped this step. Cos mine got bit crooked after leaving it to cool off on the tray.  


After baked. The bottom far right 2 charms had burned! 😖😖 my precious Teacup! 


I twisted my drawing to few different filters, that why some came out a bit dark. 


And final step, glaze! I actually doesn't mind the matte finishes. But they need a protection layer, if not they would easier get dirty. They are so prompt to dirt. Lol. 


After the 3 coats of glaze. The colours got more definite. But definitely don't look glossy la 🤔.


The back view! I like this side more. Lol.


The accessories to create a keychain. 


Viola! 

Sorry for the lousy photo. I never good at taking photo. 😅😅

Material 
  1. Printer friendly shrinking paper - Bought from www.malaysiaclayart.com
  2. Oven - any oven will do, but please don't use the same one for food making. 
  3. Keychain accessories - all bought cheaply from Taobao.com  
Tips
  1. Printer sheet - definitely use a good printer with high resolution. Unless your pattern is simple. Mine was complicated detailed drawing, that why lousy printer as my own only produced one big flat lump of colours. Lol. 
  2. Oven temperature - high temperature -> short baking time.
  3. ..however if it's too short, you won't achieve a transculent effect for the back surface. 
  4. Pressed flat while it is still hot.
  5. Glaze it for at least 3 coats to have a definite finishes.
Thanks for reading! And have fun trying! 

24 March 2015

Polka-Dot Black Transparent Nail Art


I admired those lace nail art done by others. But really wondering how they did it. I mean how to get the transparent black colour. As normal black polish won't give you such result. 

Finally I saw a tutorial where one of the nail artist taught it by mixing the transparent top coat with the black colour nail polish. Ratio : 6:1... err around la. For me it was more of trial and error to get the perfect shade of light black.

However I did not use the top coat to create this mani, I tried using the nail polish thinner, where I found more economical. You just need a drop of thinner and a coat of black colour. Voila, easy as ABC. lol 

Dipped the polka dot using the same black colour. Then later used a thin brush to draw a line around the nail. Done. 

Base & Top coat : Seche 
Black colour : OPI 4 in the morning (Satin coat)


Ohh I found the nail polish thinner at Daiso. So RM5 only. So beside this, you can dilute or save your old nail polish. Please don't use the nail polish remover to dilute the nail polish. It will only gave a temporary watery result. So definitely a No No.


The tools that I used.


Enjoy trying!


14 February 2015

Valentines Nail Art 2015


Happy Valentine's Day to All!!

Been together for 15 years, Valentine's Day to me was just another day. Yet I still bugged hubby to go for dinner celebration at least! But as i remember last few years V-day had been crashed with CNY 15th Chop Goh Mei. 

Anyhow this was my Valentines Nail Art for this year.

Coffee , Tea or Me????!!


Just done, so now rushing to shower and prepared abit for Valentine Outing! Yay Yay.

So Wish U guys have a blast no matter how U celebrate it. So long U treasure each other!


05 February 2015

Henna!! My First Attempt Trying


Phoenix design


Those who dunno me much, have no idea how obsessed I was with Henna. But sadly due to work, I don't think it is wise for me to have it draw on my hand constantly. Didn't think Henna was a common "accessories" for Chinese. 

Plus I always thought it was an expensive pleasure to have Henna art. Cos my first Henna cost me a freaking RM220! But then the fee included travelling to my house and it was meant for my wedding. So splurge abit la. Hubby paid..so didn't bother. LoL

My wedding Henna


Then my 2nd was done in India. Yes I been to India, cos one of my childhood dream was to visit Taj Mahal. Well, Taj Mahal never disappoint, it was a magnificent historical building. Only the area was full with tourist traps. So abit sien. 

Okay back to my Henna experiences. Hmm mine was done in a middle of market center on my birthday night in year 2010. I think at New Delhi. Our driver was kind enough to bargain the price for us, But then ended up the guys (yup Indian guys) did a very lousy job. But they were very fast!! I think in 15min finish for both hand. If not mistaken, it was around RM40-50/- .


My idea Henna experience


Then after that I tried few flee markets by Indian also. But those were very cheap, RM6-12. Sadly none can last more than 1 weeks. And their skills were so so. Very rough.

So I decided to buy the Henna cone and do it myself.

Well, my 1st attempt was not that shady right. But after tried it, hahaha let me more appreciated those Henna artist. Cos like tattoo, you really can't made any mistake. So I got really tense while drawing it.

I didn't diy my own Henna paste, I bought it from @meeqashi (from Instagram). Delivery fast. But couldn't really comment on her quality, since this was my first purchase. I bought 4 colours, dark red, maroon, pink and black. Only tried dark red & maroon, so far both was easy to use. But dunno bcos of the brand problem, dark red was more hard, while the maroon was more liquid, which make the line abit harsh.


I store it in a Tupperware, hopefully can make it last longer.


All of them was RM4/- each, except pink was RM5/-
The empty bottle was RM10/- which you can use it if you find the cone hard to maneuver. I haven't use it cos so far I think I still can managed it. Mine included postage was RM33/-
If you are interested to buy, you may watsap the seller - Meeqashi 013-5893461 & visit her Instagram for more products.

Then I google abit for more information, cos I knew sometime Henna quality was not the main issue to have a long lasting stain on your skin. Skin type play a major role also. So diff individual have diff effect even using the same Henna paste. 

So here is the steps to have good colour stain (from @royal_mehndi)
1) Seal henna with Lemon & Sugar paste when your Henna dry
2) Leave it for around 6-8 hours b4 scrape off the henna
3) Avoid water for at least 24 hours

Then some said it likes heat, funny was I really went to "heat up" my palm after I done.

Ohh ya, some said Black Henna was very dangerous, it said it was make of synthetic coal tar dye which can caused scar and bad effect on your skin. I guess like Hair dye, never dye your hair black, cos this colour is the worst!


I practice on a cardboard first before start on my palm. Got myself familiar with the flow and pressure of the cone. 


Aiyo even draw the head also very tense. lol. Scare my design senget jor.


Done!! But see the yellow stain? I did remind myself to stay away from water, just didn't realise holding a can of Coke could caused this. Bleh.


You could see that mine was not thick like others. At first I was worry the colour won't stay on my skin. Ehhh but after they peel off, Okay woh. The colour was very dark. Hahaha dunno bcos of the Henna cone quality or the heat really work. Ohh, I did put some oil on my skin before start drawing.


Well overall, the henna stayed on for 5 days. I guess bcos palm was more easy to get lighter. Since we wash hands alot....so 5 days.. abit short from my expectation. Oh well, nothing perfect. lol.

Here was my video on my first attempt drawing Henna. Enjoy!!


01 February 2015

Chinese New Year Nail Art 2015


Yay!! Finally I have time todo Nail Art. Lol

Been busy since New Year. Anyway this was my first CNY nail art attempt. Hopefully I have more time for few more. 

The design was inspired by @flickanail , a Japanese Manicurist. Honestly there were tonne of inspiration from Instagram. 


But let me introduced a nail art fountain pen. I recently purchased a fountain pen from @stylishnailartshop . She sell alot of different type of nail art brush, few fountain pen and nail art ink. Check it out. Eventhough the brand she carried was a Taiwan brand, Just Nail. However her service was top notch. Actually this was my 2nd time purchase, and everytime she delivered quickly and included lovely free gifts. Hehe. 

It was really easy to use. Honestly I have never been able to write such a small words before. But with this fountain pen, it was an easy task. But sadly I mistaken purchase a white colour instead of black!! Aiks. 


Nude Colour - OPI Otherwise Engaged
Red Colour - Essie Snap Happy
Gritter - Kleancolor Santa Fe Springs
For words and painting - I used the fountain pen and a Pure Color Glamor No. 1 brush (bought from @sytlishnailartshop also)

Enjoy!!